3.9. Locking a document
In the Calenco interface, the following content can be locked to prevent unwanted modification:
-
xml files ;
-
xsl files (style sheets created with the layout studio) ;
-
svg files.
This feature is available to the customer account manager and workspace administrator for:
-
locking a file to yourself;
-
lock and assign a file to another user;
-
unlock a file.
Procedure 3. To lock a file
-
In the Calenco interface, click on
 or in the menu → .
-
In the dialog box, select your own account or one of the users and confirm your choice:
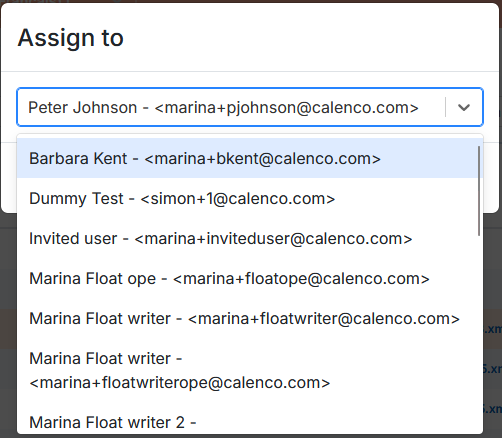
For customer account managers, workspace administrators and users-lock owners, the locked file is displayed with an orange padlock and the name of the user-lock owner:

Files assigned to another user are read-only in the editor. The customer account manager and workspace administrator can unlock them at any time.
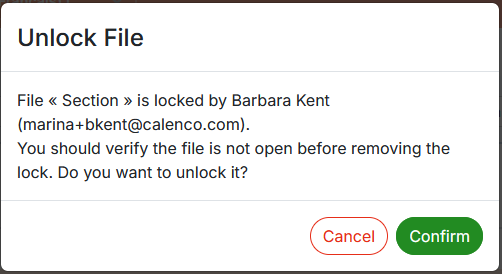
Procedure 4. To unlock a file
-
Click on its orange padlock.
-
Confirm unlocking in the following dialog box:
![[Note]](cco-note.svg)
Self-assigned files are automatically unlocked when closed in the editor.
This feature is available to accounts with the User role for:
-
locking a file to yourself;
-
unlock the file assigned to yourself.
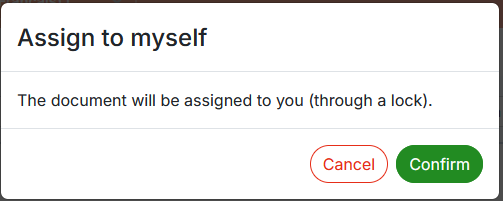
Procedure 5. To lock a file
-
In the Calenco interface, click on
or in the menu → .
-
Confirm the lock in the following dialog box:
The locked file is displayed with an orange padlock and the name of the user-owner of the lock:
The file is automatically unlocked when closed in the editor.
Procedure 6. To unlock the file without opening it in the editor
-
Click on its orange padlock.
-
Confirm unlocking in the following dialog box:
|
|
|
Files locked to other users are displayed with a faded orange padlock |

|
|
|
The customer account manager or workspace administrator can unlock any locked file. |